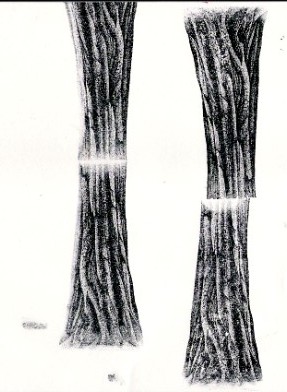
Ink the stamp using Marvy black ink. Wipe off the top and bottom edge, so you don't get a hard looking edge. Stamp the first image. Ink the stamp the same way and tip it upside down and line up the edges as good as you can. Don't worry if it isn't perfect. I get better results if the don't overlap at all.
I'm going to double tree #1, so I also wiped of the edge of the side I'm going to add to.
Ink the tree again the same way and wipe off the top and bottom and the edge that is going to be stamped next to the tree.

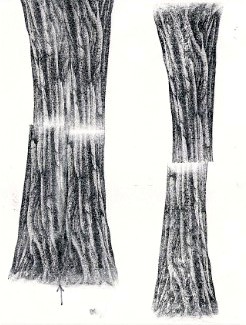
I used the small end of the black Marvy Leplume2 marker. It's the
one with 2 different points. My small ends are dried up but if I
press it lightly to my Marvy black ink pad I get a nice tip that matches
my tree.
Start with small dots (see arrow on tree) and make a line to fix the
edges. Continue using the small point to connect the two trees
together. The dots are better than lines because the whole tree is
drawn with dots. Lines are quicker so use your own judgement on
that.
Pay attention to the curve at the top of the tree when you're touching
up. It doesn't look natural if you have a peak where they
connect. You'll see what I mean as you do it.
It's important to make the grain lines continue past the connection.
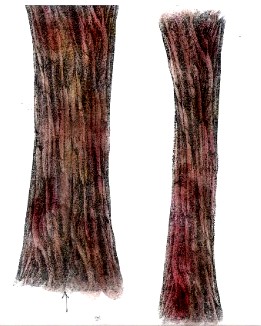
I colored my tree with stipple brushes. I need more practice with them, but you get the general idea.
One tip for coloring. Use different shades of brown to get a more textured look. Don't over work the coloring.
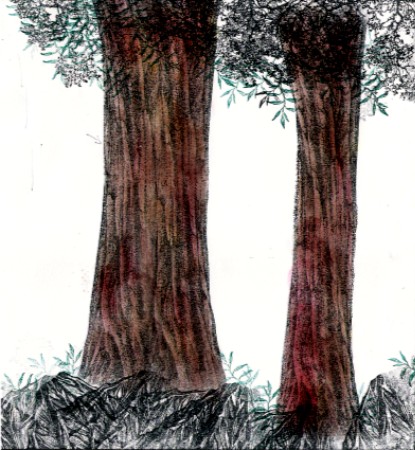
I did this on scrap paper and used the stamps that were handy at the time.
I don't think the volcano made good rocks but I'm playing with it next today and it's out on the table.
I'm looking forward to using these large trees in many scenes. I hope you found this helpful.
If you have any questions feel free to email me at cyberartist50@yahoo.com
Febe if you see anything that needs reworded, just let me know.